More Plants, Zero Dollars: How to Multiply What You Already Have
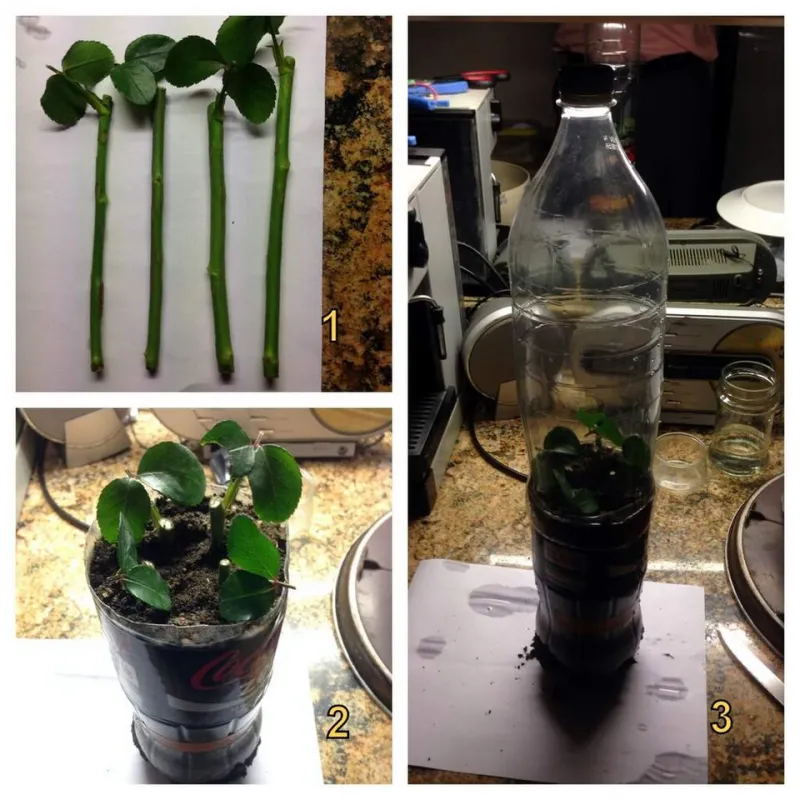
Photo: Abrahami, CC BY-SA 4.0, via Wikimedia Commons
There's a particular satisfaction in looking at a thriving garden bed and knowing that most of it cost you nothing. It's not magic, and it's not luck—it's propagation. The practice of creating new plants from existing ones is one of the oldest skills in horticulture, and it's more accessible than most gardeners realize.
Whether you're trying to fill out a new bed, share plants with neighbors, or just stretch your gardening budget as far as it'll go, learning to propagate is one of the most rewarding things you can do. Let's break it down by method.
Why Propagation Is Worth Learning
Beyond the obvious financial upside, propagating your own plants teaches you things about plant biology that you simply can't learn from a plant tag. You start to understand how roots form, what conditions encourage growth, and why some plants thrive while others struggle. That kind of hands-on knowledge sticks.
It's also deeply practical. Found a neighbor's hydrangea you love? A single cutting can give you your own. Want to fill a long border with ornamental grasses you already have? Division does the work in an afternoon. Have a favorite tomato variety you don't want to lose? Save the seeds.
Stem Cuttings: The Most Versatile Method
If you only learn one propagation technique, make it stem cuttings. It works on an enormous range of plants—coleus, lavender, rosemary, hydrangeas, salvias, sedums, begonias, and dozens more.
How it works: You take a healthy section of stem, encourage it to form roots, and pot it up as a new plant. Simple in concept, and with a little attention to detail, highly effective.
Step-by-step:
- Take a cutting from healthy, non-flowering growth. You want a stem that's actively growing but not in bloom—the plant's energy should go into roots, not flowers. Aim for 4–6 inches.
- Use clean, sharp scissors or pruners. A ragged cut invites disease.
- Strip the lower leaves, leaving just two or three at the top.
- Dip the cut end in rooting hormone powder (optional but helpful—a $6 jar lasts years).
- Stick the cutting into a moist, well-draining medium. A mix of perlite and potting soil works well. Pure perlite is even better for tricky plants.
- Cover loosely with a plastic bag or a clear plastic dome to hold humidity.
- Place in bright, indirect light. Not direct sun—cuttings can't handle the stress while they're rooting.
- Check moisture every few days. In 2–6 weeks, you should feel gentle resistance when you tug lightly, which means roots have formed.
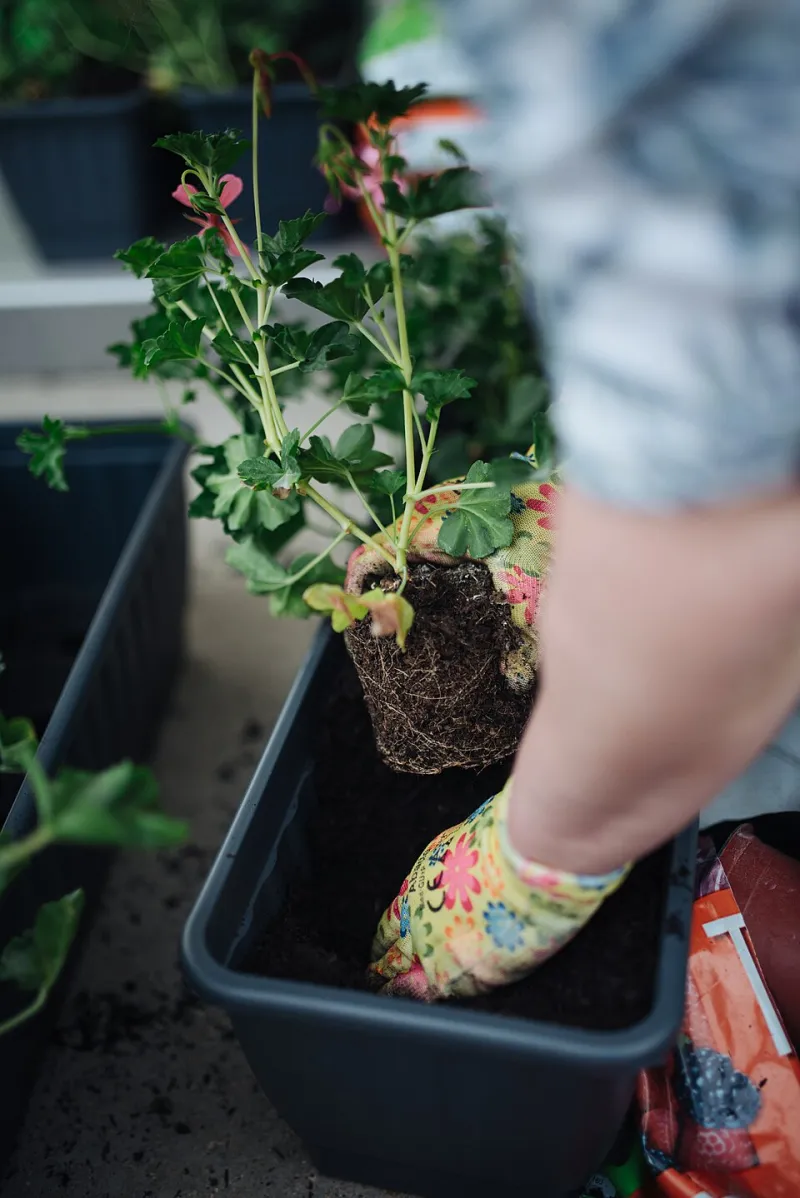
Plants that root easily from cuttings: Impatiens, portulaca, mint, basil, rosemary, lavender, forsythia, pothos (for indoor gardeners), geraniums, and most soft-stemmed perennials.
Timing tip: Late spring through early summer is ideal for most plants. Softwood cuttings—from new, flexible growth—root faster than hardwood cuttings taken in fall, though hardwood cuttings from shrubs like roses and dogwood are a worthwhile fall project.
Ground Layering: The Low-Effort Approach
If cuttings feel fussy, layering might be your method. It requires almost no equipment and works beautifully with sprawling shrubs and vines.
How it works: You encourage a low-hanging branch to form roots while it's still attached to the parent plant. The branch continues to receive water and nutrients from the mother plant while it develops its own root system—which means the success rate is very high.
Step-by-step:
- Choose a long, flexible branch that can be bent to the ground without snapping.
- About 12 inches from the tip, wound the stem slightly—scrape a small section of bark or make a shallow cut. This interrupts the flow of nutrients and encourages rooting at that point.
- Dust the wounded area with rooting hormone if you have it.
- Bury that section of the stem 3–4 inches deep, using a U-shaped pin or a rock to hold it in place.
- Water the area and keep it consistently moist.
- In 6–12 weeks, tug gently on the tip. If you feel resistance, roots have formed.
- Cut the new plant free from the parent, wait a week or two for it to adjust, then dig and transplant.
Great for: Rhododendrons, azaleas, climbing roses, forsythia, trumpet vine, and many other woody shrubs that can be stubborn with cuttings.
Division: Bigger Plants for Free, Instantly
This is the most straightforward method of all—and it applies to a huge range of perennials. Hostas, daylilies, ornamental grasses, black-eyed Susans, coneflowers, astilbe, and most clump-forming perennials can be divided every few years.
How it works: You dig up a mature clump, split it into sections, and replant. Each section becomes a new, independent plant.
When to divide: Spring and fall are both good times. Spring division works well for summer-blooming plants. Fall division is better for spring bloomers. As a general rule, divide after flowering, not before.
How to do it:
- Dig up the entire clump with a garden fork, being careful to get as much root mass as possible.
- Use two garden forks back-to-back to pry the clump apart, or slice through it with a sharp spade. For really dense clumps (ornamental grasses, for instance), a handsaw or even a reciprocating saw works.
- Discard any dead or mushy center sections. The vigorous growth is on the outer edges.
- Replant divisions at the same depth they were growing, water well, and keep them consistently moist for the first few weeks.
Seed Saving: Planning Ahead for Next Year
Seed saving is a longer game, but it's one of the most satisfying forms of propagation. If you grow open-pollinated or heirloom varieties—tomatoes, peppers, zinnias, marigolds, beans, basil—you can collect seeds at the end of the season and replant them next year.
The basics:
- Allow a few fruits or flowers to fully mature and dry on the plant before collecting.
- Extract seeds, clean off any pulp, and spread them on a paper towel to dry completely (at least a week).
- Store in labeled paper envelopes in a cool, dry place. A glass jar in the fridge works well for long-term storage.
- Test germination the following spring before committing to a full planting—sow a few seeds on a damp paper towel to see what percentage sprout.
Important caveat: Hybrid varieties (labeled F1 on seed packets) won't come true from seed. The plants you grow may look nothing like the parent. Stick to heirloom and open-pollinated varieties for reliable seed saving.
A Few Things That Make Propagation Easier
You don't need much. A spray bottle for misting, a bag of perlite, some small pots or seedling trays, rooting hormone powder, and patience will take you a long way. A heat mat can speed up rooting for cuttings, especially in a cool garage or basement—they run about $20–$30 and are genuinely useful.
Label everything. It sounds obvious, but when you have six trays of cuttings from different plants, you will absolutely forget what's what.
The Bigger Picture
Propagation changes how you look at your garden. Every plant becomes a potential source of more plants. A single rosemary bush can stock an entire herb bed. One beloved hosta can become a dozen. A cutting from a friend's garden becomes a living memory in your own.
It's one of the ways experienced gardeners quietly build lush, full landscapes without spending a fortune—and it's a skill that gets easier and more intuitive every season you practice it. Stop by Frankie's Nursery and we'll point you toward the easiest plants to start with and help you pick up whatever supplies you need to get going.