Not All Cuttings Are Created Equal: The Hidden Variables Behind Your Propagation Results
There's a particular kind of frustration that comes with propagation. You do everything right — snip below a node, dip in rooting hormone, stick it in moist mix, cover it with a plastic bag — and then you wait. Some cuttings reward your patience with a flush of new growth within weeks. Others just sit there, slowly yellowing, until you finally give up and toss them in the compost. Same plant, same technique, wildly different results.
At Frankie's Nursery, we've watched customers wrestle with this for years. The honest answer isn't that they're doing it wrong. It's that the basic instructions most people follow only cover about half the picture. The other half lives in the details — and once you understand those details, your success rate can shift dramatically.
The Cutting Itself Is Only the Starting Point
Most propagation guides tell you to take a 4–6 inch stem cutting with a few leaves. That's fine advice, but it glosses over something important: the physiological state of the parent plant at the moment you take the cutting matters enormously.
Shoots taken during active, vigorous growth — when the plant is well-watered, well-fed, and putting out new leaves — contain higher concentrations of naturally occurring auxins, the hormones that initiate root development. A cutting taken from a drought-stressed or recently repotted plant that's still adjusting to its new home is working from a depleted hormonal baseline before it even hits the rooting medium.
Timing within the season matters too. For most woody shrubs and perennials, late spring to early summer — when growth is fresh and green but not brand new — tends to produce the best results. Overly soft, brand-new growth wilts easily. Fully hardened, woody growth is slower to root. That in-between stage, what propagators call "semi-hardwood," is often the sweet spot.
Rooting Hormone: More Nuance Than the Label Suggests
Yes, you should use rooting hormone. But the way most people apply it is less precise than it could be. A few things worth knowing:
Concentration matters. Rooting hormones come in three general strengths — low (for softwood), medium (for semi-hardwood), and high (for hardwood). Using a high-concentration product on a soft, tender cutting can actually burn the stem tissue and inhibit rooting. Match the product to the cutting type.
Moisture on the stem tip affects absorption. A slightly damp cut end picks up rooting powder more evenly than a completely dry one, but a soaking-wet stem end dilutes the active ingredient. Aim for just barely moist.
Liquid and gel formulas behave differently than powder. Gel products tend to maintain better contact with the stem during insertion into the rooting medium, which some gardeners find gives more consistent results for fussy species like gardenias or camellias.
The Rooting Environment Is Where Most People Lose Points
This is the section where propagation really gets interesting — and where the gap between a casual attempt and a serious one becomes obvious.
Humidity
Leaves lose moisture through transpiration constantly. A cutting with no roots has no way to replace that moisture from below, so it depends entirely on the surrounding air to reduce the demand. You want relative humidity around the cutting to stay above 80% — ideally closer to 90–95% — during the rooting phase. A simple plastic bag over a pot works, but it's surprisingly easy to let it slip: every time you peek, open it to water, or set it near a heating vent, you're disrupting that humid microclimate.
A dedicated propagation dome with an adjustable vent is worth the small investment if you're propagating regularly. It gives you much more control and reduces the guesswork.
Light — and What Kind
Cuttings need light to photosynthesize and fuel root development, but direct sun is almost always too much. The stress of intense light pushes a rootless cutting toward moisture loss faster than it can cope. Bright, indirect light is the standard recommendation, and it's correct — but here's the nuance most guides skip: light spectrum affects rooting speed.
Blue-spectrum light (the kind that promotes vegetative growth) tends to encourage faster rooting in most species compared to warm, red-spectrum light. If you're using a grow light for propagation, a full-spectrum or blue-leaning bulb set on a 14–16 hour cycle gives cuttings a meaningful advantage over a dim windowsill.
Bottom Heat
This one is underused by home gardeners and absolutely standard in commercial operations. Soil temperature in the 70–75°F range dramatically accelerates root initiation for most species. A seedling heat mat under your propagation tray can shave weeks off your wait time, especially in cooler months. The air temperature around the cutting can actually be a bit cooler than that — the warmth at the root zone is what drives the process.
Vessel and Medium Selection
Not all rooting media are equal, and neither are containers.
For the medium: you want something that holds just enough moisture to keep the stem base hydrated without staying soggy. Pure perlite, a 50/50 perlite and peat mix, or a well-draining propagation mix all work well. Standard potting soil is usually too dense and too nutrient-rich — high fertility actually discourages rooting by telling the cutting it doesn't need to go looking for resources.
For the container: small individual cells or pots (like 2-inch cells in a seedling tray) tend to produce better results than sticking multiple cuttings in one large pot. Each cutting gets its own zone of moisture consistency, and you can remove successful ones without disturbing the others that are still working on it.
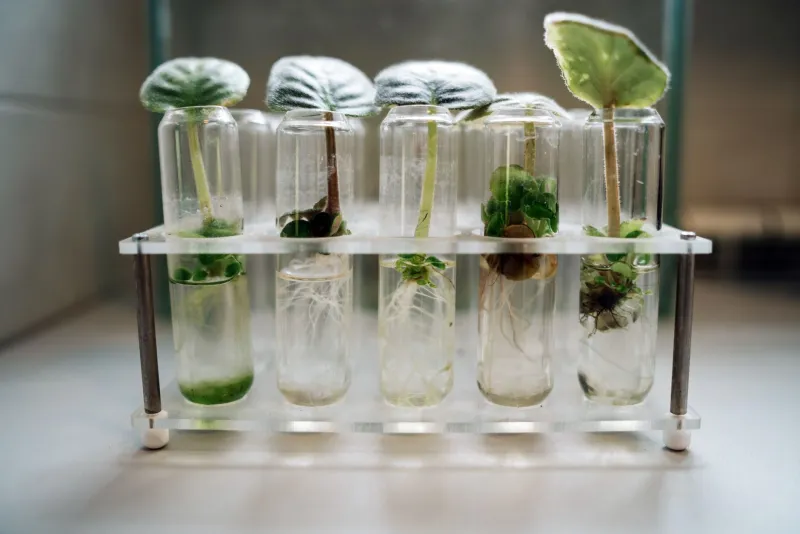
Transparent or semi-transparent containers are a secret weapon. Being able to see roots developing along the sides without disturbing the cutting eliminates the temptation to tug on it to check — which, for the record, is one of the most common ways home propagators accidentally kill cuttings that were just about to take off.
The Stubborn Ones: Species That Genuinely Need Extra Help
Some plants are just harder to propagate from cuttings than others, and knowing that going in changes your approach.
Gardenias are notorious for slow, unpredictable rooting. They benefit from bottom heat, high humidity, and a longer patience window than most plants — six to eight weeks isn't unusual.
Butterfly bush (Buddleia) roots readily but wilts dramatically and convincingly, making it look like it's dying when it's actually fine. Don't overwater in response to the wilt — that's usually what kills it.
Japanese maples are famously difficult from softwood cuttings and often require grafting for reliable results. If you're attempting them, use semi-hardwood in late summer, high-concentration rooting hormone, and expect a low strike rate even under ideal conditions.
Hydrangeas, on the other hand, are among the most forgiving plants to propagate — almost embarrassingly easy once you understand the basics. If you're new to propagation and building confidence, start there.
Keeping Track So You Can Actually Learn
One of the simplest things you can do to improve your propagation results over time is keep notes. Write down the date, the species, where the cutting came from on the plant, what rooting hormone you used, what medium, what your setup looked like. When something works really well or fails completely, you'll have something to refer back to.
Propagation rewards attention. The gardeners who get consistently high strike rates aren't necessarily more talented — they're just more observant. And honestly, that's the most encouraging thing about it: the skill is entirely learnable.